
How To Safely Change A Light Bulb – The Complete Guide
Changing a light bulb can be a rather simple process, however, there are a fair amount of things that you need to consider in order to do it in the safest and most efficient way possible.
Here we will cover how to change a light bulb and give you tips for aspects you might not have even thought about.
Contents
Safety Precautions To Take When Changing A Light Bulb
The first thing we need to consider is safety. Before we even get to the point of screwing the bulb, there are a few safety precautions we need to take.
Turn the Power Off
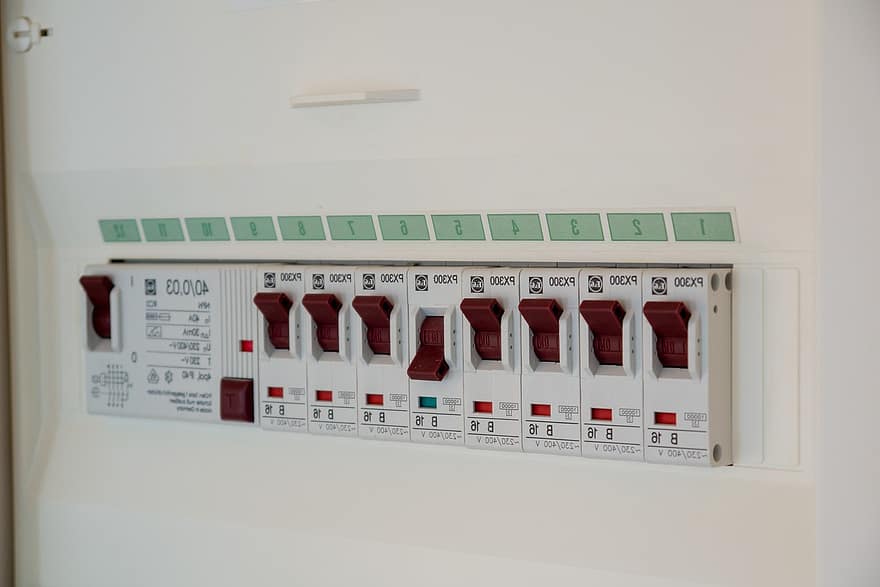
The first thing we should do before anything is to turn the power off. The absolute best way to do this is to go to your fuse box and find the single fuse that corresponds to the room you are changing the light in.
There is usually a document somewhere inside of the fusebox that tells you which fuse corresponds to which room, which should be simple enough to follow.
If there is no documentation of what fuse belongs where you can simply turn them off and on one by one and check which fuse turns the power off in the room you desire to change the light in.
The normal visual indicator that you have the right fuse is that the light goes out, however that might not apply here since the usual prerequisite for changing a light bulb is that the bulb is no longer functioning. This would mean that the bulb is always off and therefore not a valid indicator.
What you could do instead is to plug a desk fan or phone charger into a wall socket in the same room, since fuses in most cases go room by room. That way you can get a definitive visual cue that the power is off.
If you don’t go through with this step you could be running the risk of getting electrocuted. If you are interested in the different factors that go into being electrocuted while changing a light bulb, you can check out our article on it here.
Turning the power off from the bulb before you change it has 2 more purposes, one of them being the fact that it is much easier to change it when it’s off. If you change it while it’s still on you run the risk of being blinded by it, which can cause permanent eye damage. The other reason you want to do this is because of a light bulb’s surface heat.
The Surface Heat Of The Bulb
An incandescent light bulb can reach temperatures of 250 °C (500 °F). This is why it is important to turn it off and let it cool down before changing it because temperatures that high can cause some serious burn injuries.
It seems like a no-brainer but if you don’t think about it it can definitely catch you off guard and cause some otherwise easily avoidable damage.
Using a Step Ladder
In order to have the best experience while changing a lightbulb, you should definitely use some sort of step ladder. This is by far the safest way to elevate yourself enough to reach into your ceiling, as they are made to be as safe as humanly possible.
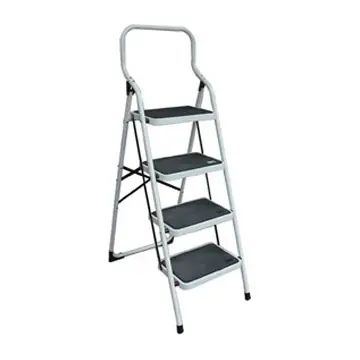
The most effective way to place the ladder would be so that the step you will be standing on just about lines up with the bulb you are changing. You don’t want it right underneath it though because then your head will be in the way of what you are trying to see and do.
However, this assumes that you have a step ladder available. While the best way to do this involves a stepladder, it might just be that you don’t have one around. Can you still change the bulb without one? Yes, but extra caution should be taken.
We would suggest using a stable chair or something else of sufficient size with 4 stable legs. This is to ensure that it won’t be unstable or otherwise fail you while you are in the middle of changing the bulb.
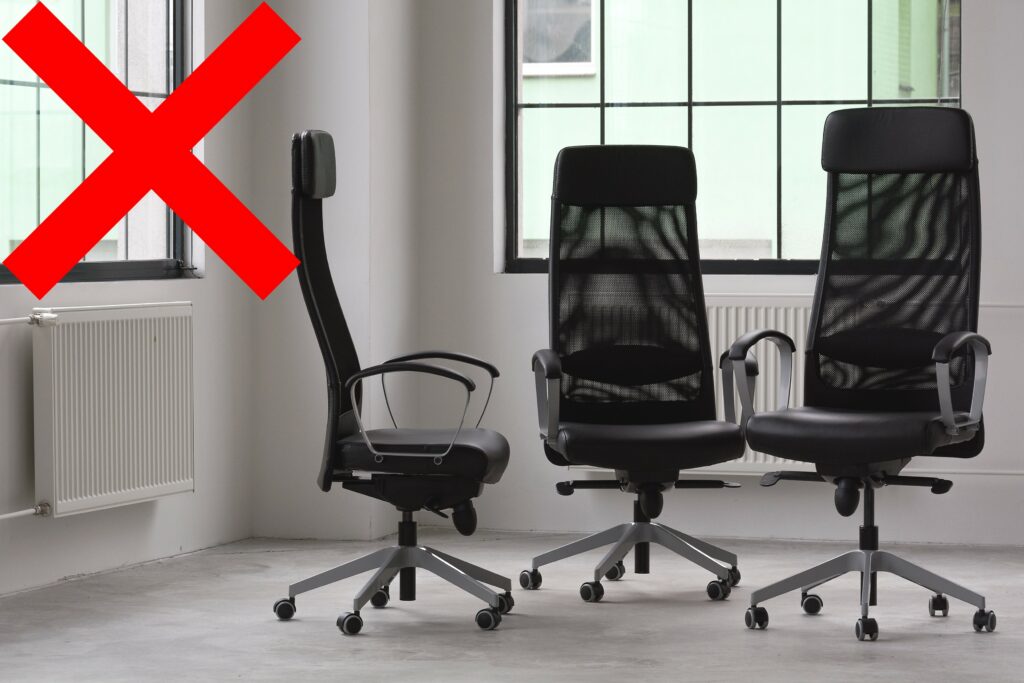
However, when talking about chairs, it is very important to have a chair that does not have wheels on it, such as an office chair. Using a chair with wheels on it to change a light bulb is like asking for injuries.
They very rarely stand still where you want them and finding balance on them while standing is very difficult. It also doesn’t help that you actually have to focus on performing a task and can’t use all of your attention to make sure you are staying balanced. So if there is one thing to take away with you, it is to never stand on chairs with wheels.
Note: Make sure you don’t have any small children or pets that might accidentally knock you over as you are standing elevated. If possible, try to close the area off if you can in order to prevent any potential risks.
Removing The Dome
Once you have something stable to stand on we need to first remove the dome of the light fixture in order to actually access the bulb itself.
This is in most scenarios rather simple, but you might run into a few difficult situations that you might not know how to tackle. Here we will go over some of the things that you could possibly be dealing with.
The most common way to remove the dome is to simply grip it with your entire hand so that your palm is curved with the dome and then twist it counterclockwise. Doing this should cause the dome to simply release and end up in your hand.
Most plastic domes use this design and usually also release when using this technique. However, some domes can use other designs or otherwise be more difficult to remove.
Some domes could have screws that are holding it in place. In that case you should unscrew the screws and then attempt to twist the dome off, unless it releases once the last screw comes off.
If it has screws, keep in mind to keep them somewhere safe where you won’t lose them while changing the bulb. The last thing you want to happen is for your screws to disappear on you by the time you want to screw it back.
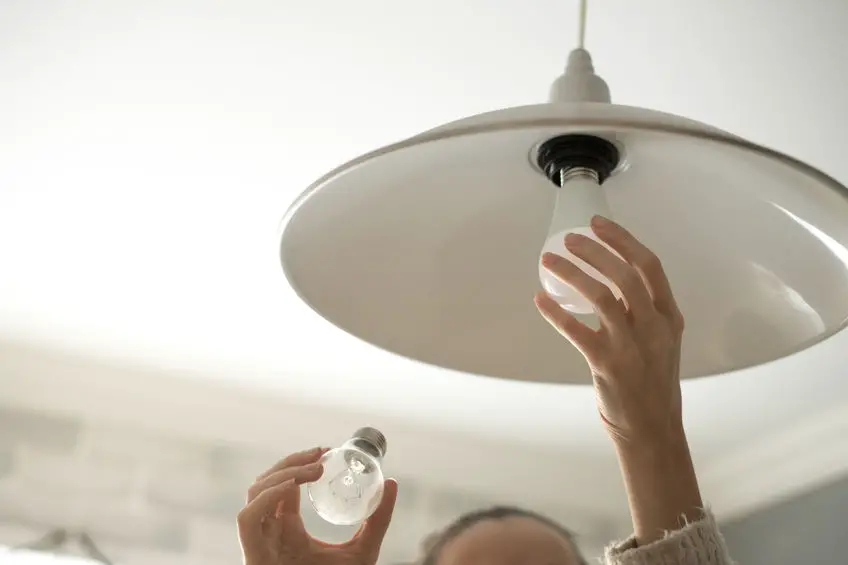
Unscrewing The Bulb
Once you have removed the dome we can start talking about how to best unscrew the bulb and the different types of bulb bases you might be dealing with.
The Common Scenarios
The bulb should come out without much problem by simply pinching it firmly and twisting it counterclockwise. This is however assuming that your bulb is based on the most standard socket system, which might not be what you are dealing with.
If you are in the UK, you may be dealing with a bayonet-based bulb, which should also be easy to deal with. To unscrew one of these you simply push the bulb gently inwards towards the fixture before you start twisting it. This should cause it to release.
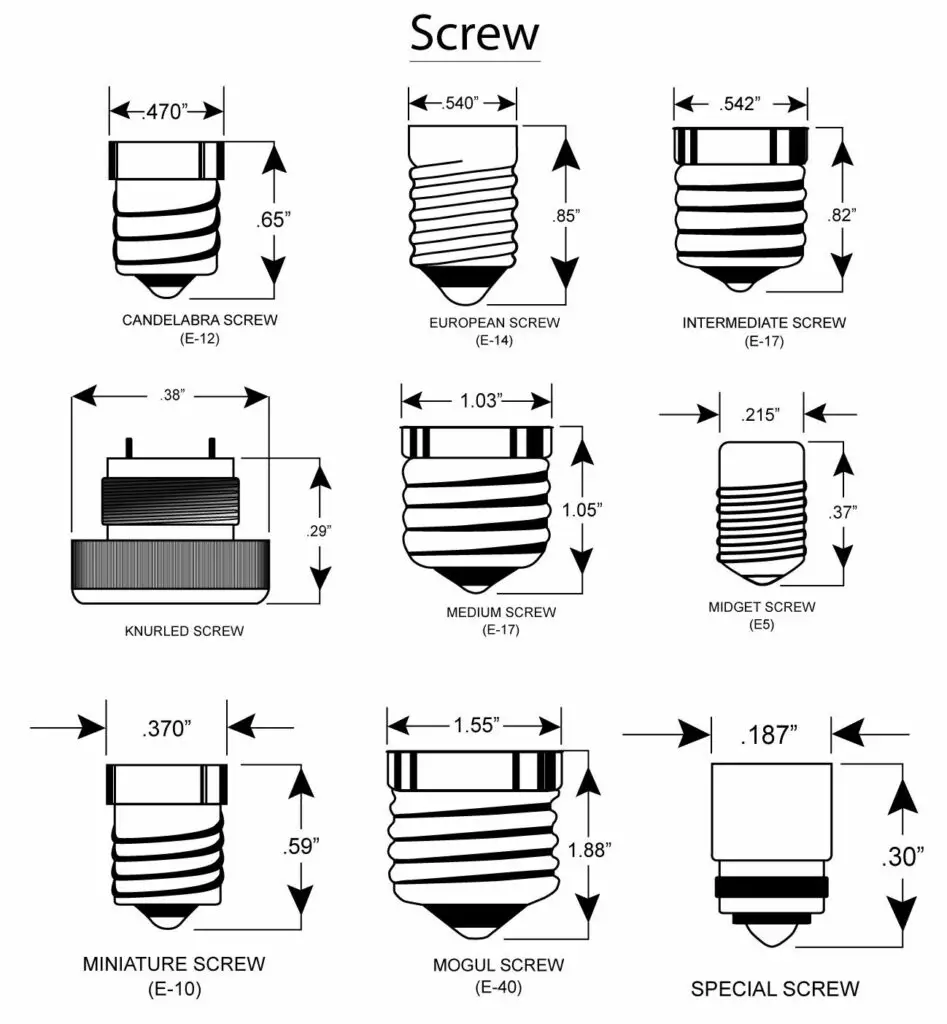
It is also possible that you aren’t even supposed to twist it at all, depending on the bulb. Your best bet in that case is to try to simply pull it out without any twisting.
One thing to note about this though is to be gentle with this process. You need to keep in mind that you are dealing with glass, which is very fragile and dangerous when broken. The last thing you want to do is to grip it with all your strength, only for it to break in your hand and leave cuts on its way out.
If you are dealing with a tube light the process is also rather simple. Removing a tube light can be done by getting a hold of it and twisting it 90 degrees where it should release.
This is because the part that plugs into the fixture will lay horizontally when installed whereas the hole that allows them to release is placed facing downwards. This means that we need the ends of the tube to be vertical in order for it to release.
Dealing With a Broken Light Bulb
Chances are that if you are changing a bulb that it might break or it was already broken, to begin with. You have a few options on how to deal with this, one popular method of doing so is the “potato method“.
This is a method in which you take a raw potato and cut it in half and to then take one of the halves and press it into the base of the bulb. This is to make the potato get stuck into the base, allowing you to start rotating it.

Doing this should enable you to get the broken bulb out without too much trouble. Keep in mind that the potato will not be safe for consumption and should be discarded after the removal is done.
That being said, make sure to carefully remove any excess glass before trying any of this though. This will generally make the process a lot safer.
If this trick doesn’t work we would suggest checking out this article that explains a few more ways you could remove a broken bulb from its socket.
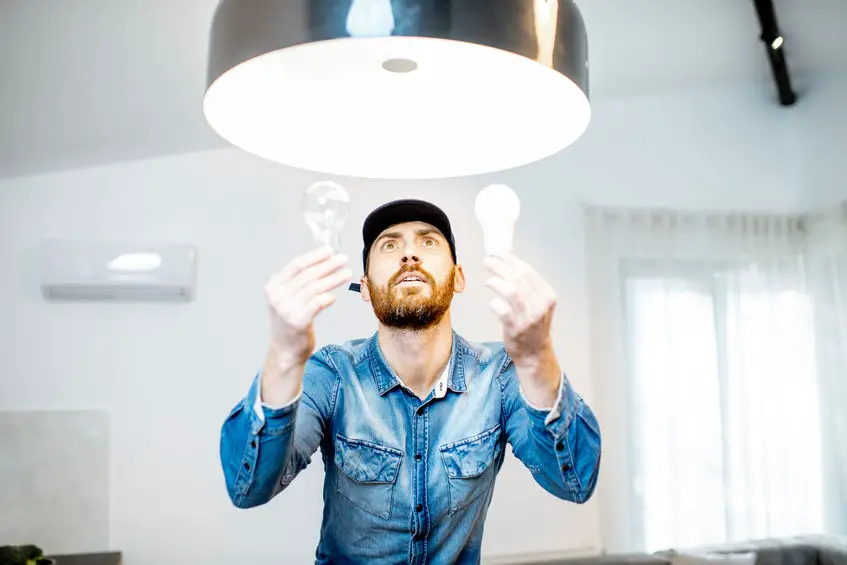
Replacing The Bulb
Replacing the bulb is usually not harder than simply taking a new bulb and screwing it into the socket clockwise. However, there are some extra factors you should think about when choosing what bulb to actually replace the old one with.
Replacing With The Correct Wattage
When choosing a good replacement bulb there are a few things you need to consider, the most important one being the wattage of the bulb.
The wattage of the replacement bulb can actually matter quite a bit. If you have a bulb of e.g 40W it is somewhat important to choose a bulb of that same power.
This is because a bulb weaker than that will most likely not produce enough light whereas a bulb stronger than that is a fire hazard. The reason why a stronger bulb can be dangerous is because of the fixture it will be sat in.
The stronger bulb will try to absorb more energy than the wiring inside of the fixture can handle, and when you try to pass through more electrons into a conductor than what it can handle it will get hot and in the worst case cause a fire.
A less strong bulb will not have the same problem because underloading a conductor is not a problem. However, since the fixture, in this case, is made for 40W, it could be that it instead overloads the bulb and in the worst case causes it to break prematurely.
That said, it is quite unusual for fixtures to constantly output their max power like that. Normally you are able to insert an LED bulb which only uses 5-10W in that fixture with no problems.
If you don’t know the wattage of the bulb you should be able to find it written somewhere along the base of the bulb. If you can’t find it there you should be able to find what wattage the fixture allows somewhere on it as well.
Choosing a Suitable Bulb
When choosing a suitable replacement bulb there are a few things you should think about.
As a baseline, we would recommend that you get a bulb as similar to the original as you can, which would include the wattage, model, base size etc. This is to ensure that the replacement will work as intended without any hassle.
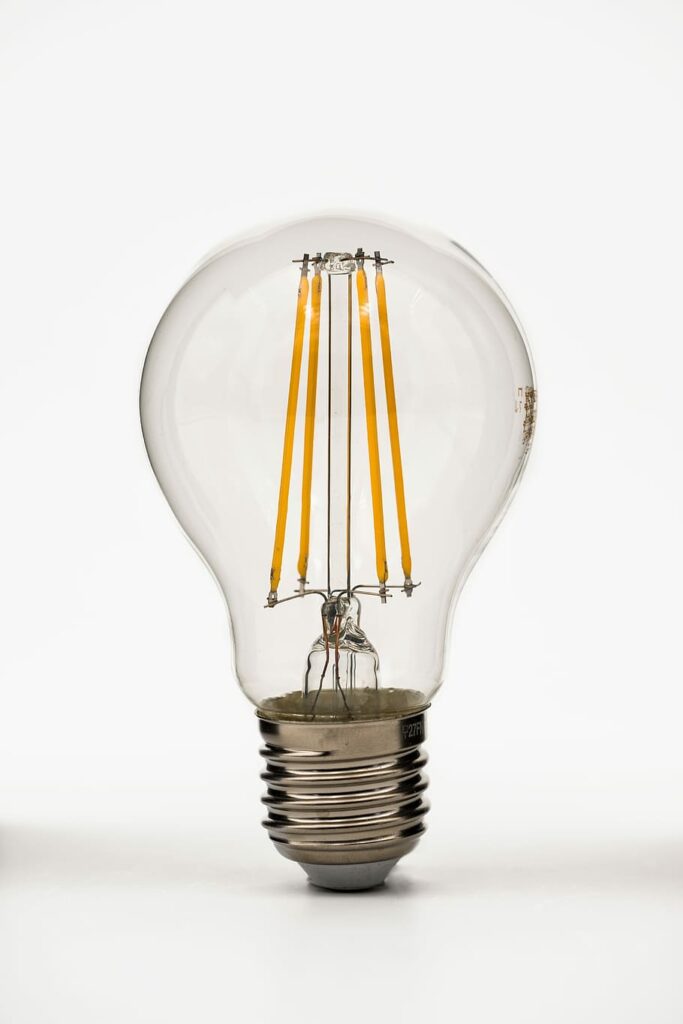
However, we would suggest that you should get a bulb that is more energy efficient and will last longer than most standard bulbs. For this, we recommend LED bulbs.
They are a little bit more expensive than your regular light bulb. That being said though, they make up for that in their supreme ability to last for a long time and is extremely energy efficient.
For your standard LED light bulb, you can expect a lifespan of at least 50 000h, which equates to about 6 years of constant light.
You can tell that a bulb makes use of LEDs if it has big yellow stripes going vertically inside of it. The yellow is in fact phosphor and helps to increase the general light quality of the LED.
Disposal of Old Light Bulb
Now that you have actually switched out the old bulb, you need to now dispose of it. There are a few ways to do this and it can depend a lot on what type of bulb you are disposing of.

There are many different types of bulbs and some need to be disposed of with more caution than others. Here we will go over good practices for how to handle your old bulbs, but if you are looking for tips for specific types of bulbs we suggest that you go here.
If you have an incandescent bulb (or any other sort that can safely be thrown into your regular garbage cans) we need to take a bit of caution. Since the bulb is made out of glass it would be a good idea to wrap the bulb with some old newspaper, plastic or package material before throwing it away.
This serves 2 purposes. One is that it protects your hands in the case of it busting and the second one is that it hopefully won’t rip the garbage bag open in the case of it breaking in the bag.
Summary
Despite seeming like a simple task, there are many aspects that go into the safety of changing a light bulb. The most important things to take away from this article are;
- Turn the power off before changing out the bulb.
- Make sure that you are standing on something secure that won’t move.
- Make sure the bulb is cool to the touch before you switch it out.

Pet Safety Regarding Christmas Lights – A Complete Overview
Materials That Christmas Lights Can And Can’t Safely Touch

What Types Of Light Bulbs Are Best To Use Outside?
About The Author
Daniel Janzon
Hello, I'm Daniel, the author behind this article and owner of this website! I'm a young soul at 23 years old with a passion for everything lighting since I find it very fascinating in general. I studied light planning for 2 years in Stockholm, Sweden and now work with light planning full time.